If you live on the Sarasota–Manatee coast, the first floor is your frontline against water. Storm surge, king tides, and intense rain events are part of life here. The good news: you can design a beautiful, functional ground level that bounces back quickly and protects your investment. This guide shows you how to plan a flood-smart first floor in Manatee County without sacrificing comfort or aesthetics.
Why Flood‑Resilient Design Elevates Coastal Living
Smart first-floor planning does more than meet code. It helps you return to normal faster, keeps maintenance predictable, and preserves long-term value. Manatee County uses FEMA flood maps and local procedures to determine flood zones and base flood elevations. Treat those as the starting point, then design to a higher, safer standard as your budget allows per Manatee County’s floodplain guidance and tools.
Recent resilience studies using NOAA scenarios project more frequent high tide flooding and several inches of sea level rise by midcentury, which supports the case for extra elevation and water-smart detailing today as summarized in regional reporting. In short, code is the minimum. Design for how the site will perform across the next few decades.
Elevation and Ground‑Level Use That Works
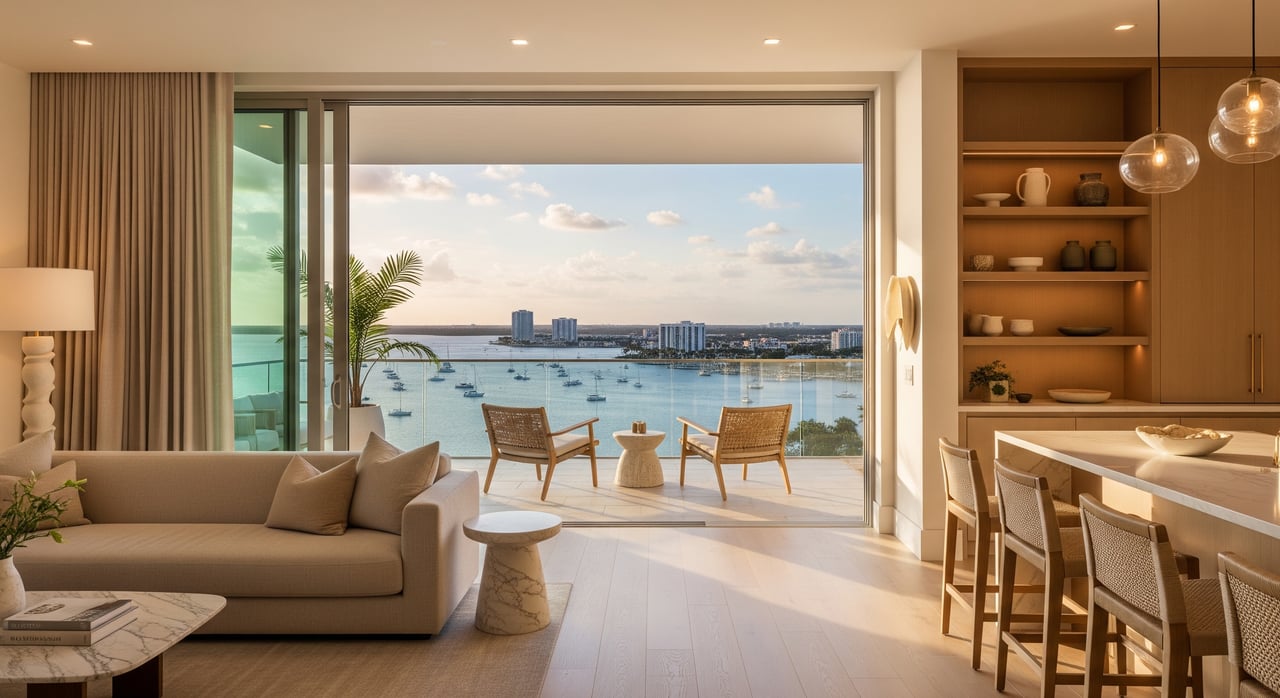
The most resilient coastal homes elevate what matters and let water move through low-risk areas. Organize the first floor for quick clean-up and a refined arrival.
Establish a Clear Design Datum
Start by defining a single reference height that all critical elements must clear. This is your design flood elevation: the required Base Flood Elevation plus freeboard. The Florida Building Code includes a minimum of 1 foot of freeboard above BFE, and local rules can be higher. Many owners choose an additional 1 to 3 feet for peace of mind and better insurance outcomes see Florida floodplain guidance on FBC freeboard.
Layer steps, stoops, and platforms so thresholds, outlets, and finishes sit above that datum. Use subtle changes in grade, low risers, and integrated lighting to make the elevation feel effortless.
Program Spaces Built to Get Wet
Keep the lowest level simple and durable. Ideal ground-level uses include:
- Parking and bike storage
- Mudroom or rinse-down transition zones
- Secure storage with flood-damage-resistant materials
- Lobbies or lift vestibules designed for fast dry-out
Any enclosed area below the lowest floor in A-type zones must include flood openings that equalize pressure. The common prescriptive rule is at least 1 square inch of net open area for every 1 square foot of enclosed area, with at least two openings and the bottom no more than 1 foot above adjacent grade per FEMA TB-1. Use flood-resistant materials for all surfaces at or below the design datum per FEMA TB-2.
Design the Arrival Sequence
An elevated home can still feel gracious at entry. Combine sculptural stairs with a discreet ramp or lift, plan landings for rest and views, and set lighting and handrails to guide movement safely. In coastal high hazard areas, breakaway elements may be required below the elevated floor. Coordinate stair and landing design with structural and floodplain requirements during permitting FEMA technical bulletins overview.
Structure and Envelope Moves That Manage Water
Your structure should resist lateral forces and let water move through low-risk areas without damage.
Foundations and Breakaway Components
- Open foundations: Piers, piles, or columns reduce obstruction to surge and are standard in coastal zones.
- Breakaway walls: In V and VE zones, non-structural walls under the elevated floor are designed to fail in a controlled way, protecting the main structure. Use rated connections and detail finishes so replacement is quick see FEMA guidance on breakaway walls.
- Elevated slabs or compliant crawlspaces: In A and AE zones, elevated slabs can work if you meet opening and material rules. Crawlspaces must have flood openings sized and located per TB-1 FEMA TB library.
Wet vs. Dry Floodproofing Zones
For residences, wet floodproofing is the typical approach at ground level. You design non-habitable spaces to allow water in and out, with compliant openings, and use materials that tolerate immersion. Dry floodproofing, which seals water out, is generally not permitted for new or substantially improved residential buildings in Coastal High Hazard Areas and is limited elsewhere for homes. Use dry floodproofing for non-residential portions only where allowed and with engineering FEMA mitigation guidance.
Openings, Doors, and Flood Vents
Choose products that do the job without calling attention to themselves:
- Engineered flood vents can reduce the number of openings and integrate cleanly with the facade. They require certification and must be documented on the Elevation Certificate TB-1.
- Sills and thresholds should sit above the design datum. Where thresholds are lower, plan sacrificial finishes and rapid-dry details.
- Maintain safe egress routes that remain passable after minor flood events.
Mechanical, Electrical, and Plumbing That Stay Operational
Keeping systems dry and accessible is one of the best returns on your resilience investment.
Elevate and Consolidate Critical Equipment
Relocate electrical panels, HVAC equipment, water heaters, and main shut-offs above the design datum, ideally on an upper mechanical platform or conditioned utility room. When elevation is not possible, follow FEMA guidance for anchoring, GFCI protection, and water-resistant components. A practical rule of thumb is to place critical equipment at least 1 foot above BFE or at your locally adopted design flood elevation FEMA mitigation guidance.
Quick‑Recovery Details
- Provide labeled shut-off points for water, gas, and power at reachable heights.
- Use clean-outs and backflow preventers on sanitary lines to reduce backups during flood conditions.
- Group service manifolds with clear access panels so trades can restore service quickly after an event FEMA mitigation guidance.
Drainage and Sump Strategy
Slope floors in garages and transition spaces toward trench drains tied to sumps or daylight where allowed. Use redundant pumps and alarms. Seal penetrations, add raised curbs at doorways where feasible, and integrate grit mats or removable slat decking to protect finished floors.
Materials and Finishes That Bounce Back
Select assemblies that tolerate short-term immersion, clean up easily, and still feel refined.
Floors, Walls, and Ceilings
- Floors: Polished or sealed concrete, terrazzo, or large-format porcelain with epoxy grout. Avoid wood at or below the design datum.
- Walls: Concrete or CMU with mineral-based coatings. If framed, use pressure-treated or naturally durable wood with closed-cell foam selectively where allowed. Avoid paper-faced gypsum and moisture-trapping assemblies at or below the datum.
- Ceilings: Keep them simple and removable in ground-level zones, or use moisture-tolerant finishes with accessible service panels.
FEMA classifies flood damage-resistant materials and outlines acceptable uses at and below BFE. Use those lists to inform specifications FEMA TB-2 materials list.
Casework, Built‑Ins, and Furnishings
- Elevate millwork bases on masonry curbs or stainless legs and use removable toe kicks.
- Specify marine-grade hardware and PVC or metal cabinets for storage zones that may get wet.
- Choose furnishings that are light, raised, or easy to relocate before storms.
Exterior Cladding and Hardscape
- Cladding: Fiber cement, stucco on CMU, or metal panels with corrosion-resistant fasteners. Keep wood cladding above the design datum.
- Openings: Use corrosion-resistant frames and sills. Plan sill heights above the datum.
- Hardscape: Favor permeable pavers, gravel bands, and slot drains that move water away quickly. Avoid creating bowls that trap water next to the building.
Site, Landscape, and Water Management Integration
Great first floors start with a site that steers water away from the building and toward safe discharge points.
Grading and Overland Flow Paths
Shape the site so water has a predictable path that avoids entries and equipment pads. Maintain positive slope away from the foundation, use swales to catch and redirect flow, and coordinate discharge with local stormwater requirements so you do not push water to neighbors regional watershed planning resources.
Permeable Surfaces and Planting
Use permeable surfaces for drive courts and walkways where feasible. Pair with salt-tolerant, deep-rooted plantings that stabilize soils. Keep planting clear of flood openings and avoid mulch that can become debris during surge.
Storage, Screens, and Outdoor Rooms
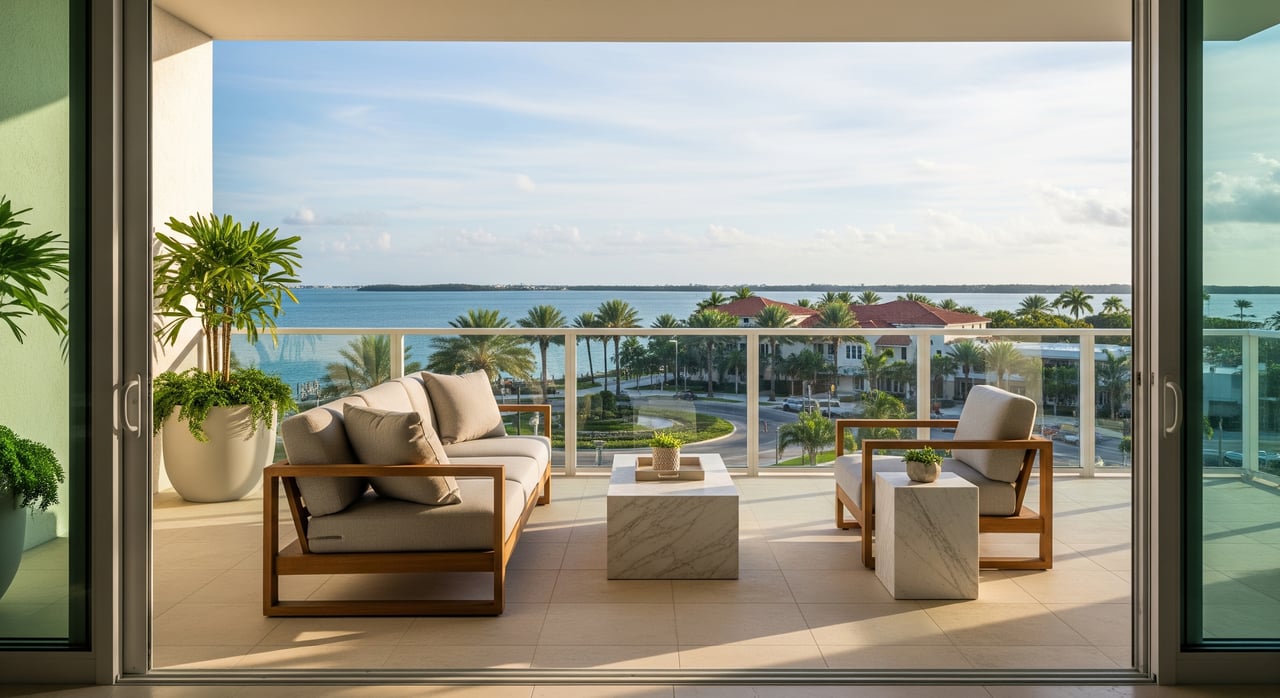
Design outdoor gear storage with flood-resistant materials and raised bases. Use screens and lattice that can break away or be removed before storms. Elevate outdoor rooms and kitchens so they remain usable after an event, with hose bibs and floor drains for clean-down.
Compliance, Insurance, and Team Coordination
Resilient design is easiest when you align early with codes, documentation, and insurance expectations.
Align Early With Your Professional Team
Bring your architect, structural engineer, contractor, and landscape architect together at concept phase. Confirm the flood zone, Base Flood Elevation, and any local freeboard requirements with Manatee County Floodplain Management. The county offers an online flood zone tool and can provide Elevation Certificates or written flood elevation determinations on request Manatee County Floodplain Management.
Verify your project’s requirements under the Florida Building Code, which meets or exceeds NFIP minimums and references ASCE 24 for flood-resistant design. Local amendments may add freeboard or other standards, so check the current edition at permit time Florida floodplain guidance on FBC and ASCE 24 and ASCE 24 standard.
Product Approvals and Documentation
- Detail and document flood openings per TB-1. Engineered vents require certification and must be shown on the Elevation Certificate FEMA TB-1.
- Specify flood-damage-resistant materials at or below your design datum per TB-2 FEMA TB-2.
- In coastal high hazard areas, use breakaway walls below elevated floors and detail per FEMA TB-9 guidance breakaway wall information.
Thorough documentation streamlines permits and can improve insurance underwriting because it clarifies elevations, openings, and material selections.
Budgeting for Resilience
Prioritize upgrades with the strongest value and recovery impact:
- Elevation and freeboard beyond minimums
- Relocation of mechanicals and panels
- Engineered flood openings and materials package below the datum
- Site drainage, backflow prevention, and sump redundancy
If your property experiences substantial or repetitive flood damage, NFIP’s Increased Cost of Compliance coverage may provide up to 30,000 dollars to bring the structure into compliance, subject to eligibility and coordination with local officials and your insurer ICC overview. Longer term, federal and state mitigation programs sometimes fund elevation and reconstruction through local or state applications FEMA mitigation programs.
Luxury Touches That Complement Resilience
High design and high performance belong together on the coast.
Concealed Lifts and Sculptural Stairs
Tuck a private lift behind a slatted screen and pair it with an expressive stair that frames a view. Use non-slip treads, integrated lighting, and stainless details that withstand salt air. Coordinate floodplain rules for any ground-level enclosures early in design FEMA technical bulletins.
Elevated Amenities and Storage
Put wine storage, wellness rooms, lounges, and hobby spaces above the design datum. Keep ground-level amenities simple and water tolerant, with quick-hang partitions that can be removed and replaced.
Lighting and Art Placement
Plan art walls and sculptural lighting above the datum, use sealed fixtures in lower zones, and specify corrosion-resistant finishes. Provide dedicated circuits at elevated panels for easy isolation and restart after a storm FEMA mitigation guidance.
Next Steps to Plan a Resilient First Floor in Manatee County
Here is a streamlined path to move from idea to permits with confidence:
- Establish your site’s flood zone and BFE using Manatee County’s online flood tool, then request any available Elevation Certificate or a written flood elevation determination from the county Manatee County flood tool.
- Set your design datum: BFE plus required freeboard, then consider voluntary extra elevation based on risk tolerance and long-term value Florida floodplain guidance.
- Assemble your team and align on structure, openings, and materials per FEMA technical bulletins and ASCE 24 before schematic design goes too far FEMA TB library and ASCE 24.
- Program the ground level for parking, storage, and transition spaces that can get wet, then elevate utilities and amenities above the datum.
- Document elevations and product certifications thoroughly to support permits and insurance. Ask your agent about how elevation and openings may influence premiums Manatee County flood FAQs.
If you would like a tailored plan for a new build or renovation, we can connect you with the right design and engineering partners and help you weigh resilience features against market value. Schedule a Private Consultation with Teresa Tyrrell & Company to explore resilient, design-forward coastal living in Sarasota and Manatee.
FAQs
What maps and elevations control my first-floor design in Manatee County?
- FEMA Flood Insurance Rate Maps and county procedures establish your flood zone and Base Flood Elevation. Use the county’s flood zone tool and request an Elevation Certificate or written determination from Floodplain Management for accuracy.
How much higher than BFE should I build?
- The Florida Building Code includes at least 1 foot of freeboard above BFE. Many owners add 1 to 3 feet for better performance and potential insurance benefits, especially given future high-tide and surge projections.
Do I need flood vents in ground-level enclosures?
- Yes, if you have enclosed areas below the lowest floor in A-type zones. The prescriptive rule is 1 square inch of net opening per square foot of enclosure, at least two openings, and the bottom within 1 foot of grade. Engineered vents are allowed with documentation.
Can I dry-floodproof my residence?
- Generally no in Coastal High Hazard Areas and limited elsewhere for homes. Residential projects typically use wet floodproofing for non-habitable ground-level spaces and elevate living areas.
Which materials are acceptable below the design datum?
- Use flood-damage-resistant materials like concrete, CMU, treated wood, corrosion-resistant metals, and select closed-cell insulations. Avoid paper-faced drywall and moisture-trapping assemblies at or below the datum.
Will resilient upgrades lower my flood insurance?
- Elevation, compliant flood openings, and documented elevations often improve rating. Keep Elevation Certificates and product certifications on file. Your insurer will rate based on verified elevations and features.
Who can help me verify requirements and submit permits?
- Start with Manatee County Floodplain Management and a licensed architect or engineer familiar with ASCE 24 and the Florida Building Code. Early coordination smooths approvals and helps align design with insurance expectations.